
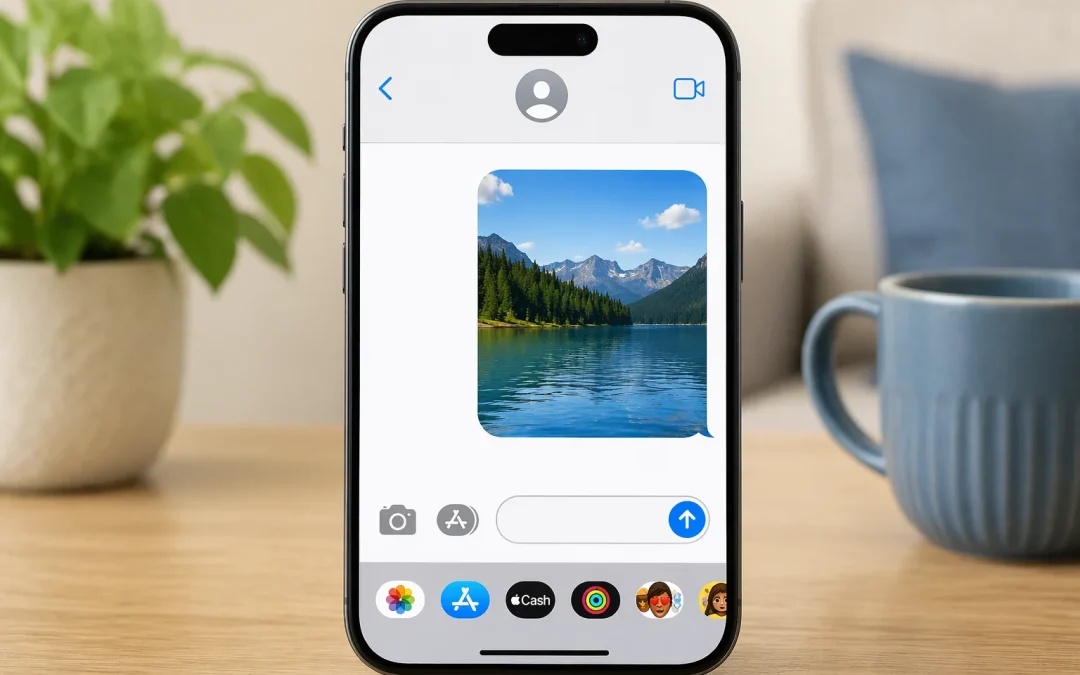

Yes, you can usually send a picture on an iPhone using the Messages app or Mail app, and this guide is for people who already have an iPhone and a working mobile or Wi‑Fi connection. In most cases, it only takes a minute or two once you know where the buttons are. This guide does not apply to Android phones or old non-smart “flip” phones, and it will not fix problems caused by a completely disconnected or blocked phone service.
Table of Contents
- Quick Summary
- Before You Start: Things to Check
- How to Send a Picture in the Messages App (iPhone to Phone Number)
- How to Email a Picture from Your iPhone
- How to Send a Picture That Is Already in Your Photos
- How to Take a New Photo and Send It Right Away
- What Can Go Wrong (and Simple Fixes)
- Safety and Scam Awareness
- FAQ
- Final Summary
Quick Summary
- What the problem usually means: You are not sure which buttons to tap to attach and send a photo from your iPhone.
- Most common cause: Confusing icons in the Messages or Mail app, or a small change after an update.
- How long it takes to fix: Usually 5–10 minutes to learn and practice the steps.
- When it may require help: If messages will not send at all, your phone has no signal, or your storage is completely full.
Before You Start: Things to Check
Before sending a picture, it helps to make sure your iPhone is ready. You do not need to change many settings, but a few simple checks can prevent frustration. These steps are the same on most recent iPhones, though the exact look of the screen may vary slightly depending on your iOS version.
First, check that your iPhone is connected to the internet. Look at the top-right corner of the screen. You should see either Wi‑Fi “fan” bars or mobile data bars (with letters like 4G, LTE, or 5G). If you see “No Service” or “SOS,” picture messages may not send until you move to an area with better signal or connect to Wi‑Fi.
Next, make sure your battery is not critically low. If your phone is under 10% battery, plug it in if possible. While this does not usually stop you from sending a photo, a dying battery can interrupt what you are doing. If your battery drains quickly in general, you may find it helpful to read Why Your iPhone Battery Drains Fast later.
If your iPhone is very full, it may struggle to save or send new photos. If you often see warnings about storage, consider cleaning up space using the guide How to Clean Up Storage on Your Phone. This is not required to send a single picture, but it can prevent problems.
These checks usually take 2–3 minutes. Difficulty level: Easy. A common mistake is to ignore “No Service” or Wi‑Fi being off and think the phone is broken. A realistic limitation is that if you have no internet or mobile signal at all, your iPhone cannot send pictures until the connection is restored.
How to Send a Picture in the Messages App (iPhone to Phone Number)
Most people send pictures from an iPhone using the Messages app. This is the green-and-white speech bubble icon on your Home Screen. You can send a picture to another iPhone, or to many other mobile phones, as long as you have their phone number and a signal. The steps below describe the newer layout, but older iPhones are very similar.
Steps:
- Open the Messages app (green speech bubble icon).
- Tap an existing conversation with the person you want to send the picture to, or tap the new message icon (a square with a pencil) in the top-right and type their phone number or name.
- Look at the row of icons just above the keyboard. On many iPhones, you will see a small Photos icon (it looks like a colorful flower) or a + (plus) button you can tap to choose Photos.
- Tap the Photos icon. Your recent photos should appear. Tap the picture you want to send. A small check mark or preview will show it is selected.
- Optional: Type a short message in the text box (for example, “Here is the photo from today”).
- Tap the Send button (a blue or green arrow pointing up or to the right) to send the picture.
If your screen looks different, look for any icon that resembles a photo, camera, or a plus sign near the typing area. On some older iPhones, there is a small camera icon directly to the left of the text box. Tapping that will also let you choose a photo to send.
This process usually takes 1–3 minutes once you know where the buttons are. Difficulty level: Easy. One common mistake is tapping the photo but forgetting to tap the Send arrow, so the picture sits in the text box and never goes out. A realistic limitation is that if the other person’s phone is turned off, has no signal, or has blocked picture messages, they may not receive the photo right away, even though your iPhone says it was sent.
How to Email a Picture from Your iPhone
Sometimes you may want to send a picture to someone’s email address instead of their phone number. This is useful for sending photos to people who use a computer more than a phone, or when you are sending documents or many pictures at once. You will use the Mail app or another email app you already have set up on your iPhone.
Steps:
- Open the Photos app on your iPhone (colorful flower icon).
- Find and tap the picture you want to send so it fills the screen.
- Tap the Share button. This looks like a square with an arrow pointing up, usually at the bottom-left of the screen.
- In the menu that appears, look for Mail. Tap Mail. A new email window will open with your picture already attached.
- In the To: field, type the person’s email address. In the Subject line, type a short description (for example, “Photo from our trip”).
- Optional: Type a message in the body of the email.
- Tap the Send arrow (usually in the top-right corner).
If your screen looks different, you might be using a different email app such as Gmail or Outlook. In that case, after tapping the Share button, look for the name of your email app instead of Mail. The idea is the same: choose the app, then fill in the address and send.
Sending a picture by email usually takes 2–4 minutes. Difficulty level: Easy to Moderate, depending on how comfortable you are with email. A common mistake is forgetting to add the recipient’s email address, which will prevent the email from sending. A realistic limitation is that very large groups of photos may be too big to send in one email; your iPhone may ask if you want to send a smaller version of the images, which is usually fine for most people.
How to Send a Picture That Is Already in Your Photos
Often, you will want to send a picture you took earlier, such as a family photo or a picture of a document. The easiest way is to start from the Photos app and then choose how to share it. This method works for both text messages and email, and it looks similar on most iPhones.
Steps:
- Open the Photos app on your iPhone.
- Tap Library or Albums at the bottom to find your picture. Tap the photo you want so it fills the screen.
- Tap the Share button (square with an upward arrow) at the bottom-left.
- In the row of options, tap Messages if you want to send it as a text, or Mail if you want to send it as an email.
- If you chose Messages: In the “To:” field, type the person’s name or phone number, then tap it when it appears. Optional: add a short message. Then tap the Send arrow.
- If you chose Mail: Type the person’s email address, a subject, and optional message, then tap the Send arrow.
If your screen looks different, you might need to scroll the sharing options left or right to find Messages or Mail. On some older iPhones, the layout of the Share menu is slightly changed, but the square-with-arrow icon is the same.
This method usually takes 2–5 minutes, especially if you are looking through many photos. Difficulty level: Easy. One common mistake is accidentally selecting multiple photos when you only meant to send one, which can make the message larger than expected. A realistic limitation is that if you are on a very slow internet connection, sending many photos at once can take a while, and they may appear to “spin” or show a progress bar before they are fully sent.
How to Take a New Photo and Send It Right Away
Sometimes you want to take a fresh picture and send it immediately, such as a photo of a bill, a prescription label, or something you want a family member to see. You can do this directly from the Messages app, which saves a few steps. The exact icons may look slightly different on older iPhones, but the idea is the same.
Steps:
- Open the Messages app and tap the conversation with the person you want to send the picture to (or start a new message and add their number).
- Look near the text box for a camera icon. On many iPhones, it is to the left of the typing area or inside a + menu.
- Tap the camera icon. Your camera will open at the bottom of the screen or full-screen.
- Point your camera at what you want to photograph. Tap the white shutter button (big circle) to take the picture.
- After taking the photo, you will usually see options like Use Photo or Retake. Tap Use Photo if you are happy with it.
- The photo will appear in the message box. Optional: type a short note. Then tap the Send arrow to send it.
If your screen looks different, you may need to tap a small Photos or Apps button first, then choose the camera from a row of icons. Apple sometimes moves these icons after updates, but the camera symbol is usually easy to recognize.
This process usually takes 1–3 minutes. Difficulty level: Easy. A common mistake is taking the photo but then tapping “Retake” by accident, which discards the picture and makes you start again. A realistic limitation is that if your camera lens is dirty or your lighting is poor, the person may not be able to read small text in the photo, such as on medicine bottles or documents. In those cases, try moving to better light or taking a closer, clearer picture.
What Can Go Wrong (and Simple Fixes)
Even when you follow the steps correctly, small issues can appear. Most of these are simple to handle and do not mean anything is seriously wrong with your iPhone. Here are some common situations and calm next steps.
If a button looks different from the pictures or descriptions, look for something with a similar shape or purpose. For example, if you do not see a Photos icon, you might see a + button that opens more options, including Photos or Camera. Apple sometimes changes icons after updates, but the basic idea stays the same: you are looking for a way to “attach” or “share” a photo.
If a setting seems missing, such as not seeing Messages or Mail in the Share menu, try scrolling the row of icons left or right. If it is still missing, your email account might not be set up on the phone yet, or the app may be turned off. In that case, you may want to ask a trusted family member or local tech helper to check your email settings.
If your iPhone recently updated and the layout changed, take a moment to explore calmly. The Share button (square with arrow) and the camera icon are usually still present, even if they moved slightly. If restarting your iPhone does not fix sending problems, check your signal and Wi‑Fi again, and make sure Airplane Mode is off.
On older devices, things may run more slowly, and some newer features might not appear. You can still send pictures, but you may need a bit more patience while the phone thinks. If you feel stuck, it is perfectly fine to write down what you see on the screen and ask a trusted person or a local store for gentle, in-person help.
Safety and Scam Awareness
Sending pictures is usually safe, but it is wise to be careful about who you send them to and what the pictures show. Only send personal photos to people you know and trust. Avoid sending clear photos of credit cards, full ID cards, or anything that shows private information unless you are absolutely sure it is necessary and safe.
Legitimate help with sending photos will not ask you to pay money just to fix a simple messaging problem. Be cautious of anyone who calls you or messages you and offers to “fix your phone” if you pay them or let them control your device remotely. Real helpers, such as family members or local phone shops, do not need to take over your phone from far away just to show you how to send a picture.
Never share verification codes that are texted to you, even if someone claims to be from your bank, your phone company, or Apple. Those codes are meant only for you. Also, be careful with links in messages that you did not expect. If something feels rushed or threatening, such as “Send this now or your account will be closed,” it is safer to ignore the message and contact the company using a phone number you already trust.
FAQ
1. Is sending a picture on my iPhone difficult?
For most people, it becomes easy after you do it a few times. The first time can feel confusing because of the icons, but the steps are short and repeatable.
2. Will I lose my photos if I send them?
No. Sending a picture does not delete it from your iPhone. The original stays in your Photos app unless you choose to delete it yourself later.
3. Do I have to pay extra to send pictures?
Usually, no. If you have a normal mobile plan or are on Wi‑Fi, sending pictures is included. However, if you have a very limited data plan, sending many photos over mobile data could use some of your allowance. If you are unsure, you can send pictures while connected to Wi‑Fi.
4. Is sending a picture a sign of a virus or something unsafe?
No. Sending a photo from your iPhone using Messages or Mail is a normal, safe activity. Just be careful about who you send photos to and what is visible in the picture.
5. How long does it take for my picture to arrive?
Often it arrives within a few seconds to a minute. If the other person has a weak signal or slow internet, it may take longer. Your message may show a small progress bar or say “Delivered” when it has gone through.
6. What if I tap the wrong button or send the wrong photo?
Everyone makes mistakes with phones. If you send the wrong picture, you can send a follow-up message explaining the mistake, or ask the person to delete it. On some newer iPhones and iMessage conversations, you may be able to undo or edit a message shortly after sending, but you should not rely on this. Taking your time before tapping Send helps prevent errors.
Final Summary
Sending a picture on your iPhone is very doable once you know where to tap: you choose the photo, pick Messages or Mail, add the person, and press Send. Most difficulties come from confusing icons, small layout changes, or weak internet connections, not from anything being seriously broken. With a bit of practice, you can confidently share photos of family, documents, or special moments whenever you like. If you still feel unsure, it is perfectly fine to ask a trusted family member, friend, or local tech helper to walk through the steps with you slowly until it feels comfortable.